Step 1:
In bring up the script creation screen, click on the Rx icon on the top left of the menu bar.
Additionally, please ensure that you are working within the correct clinic.

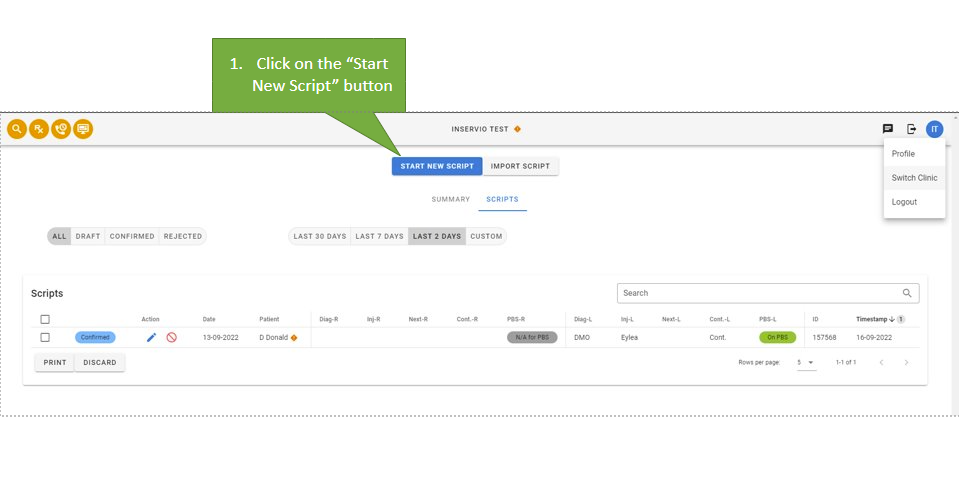
Step 2:
Click on the Start New Script button to create a new script.
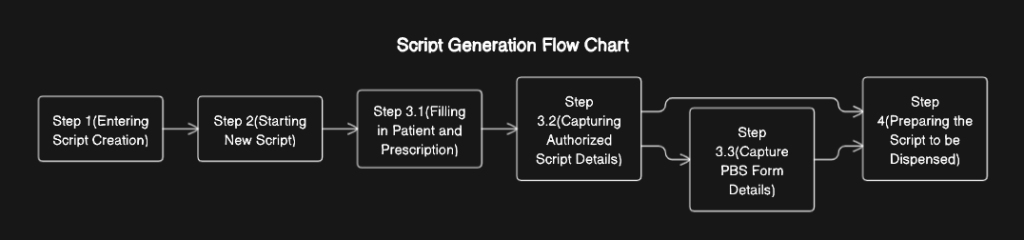
Step 3:
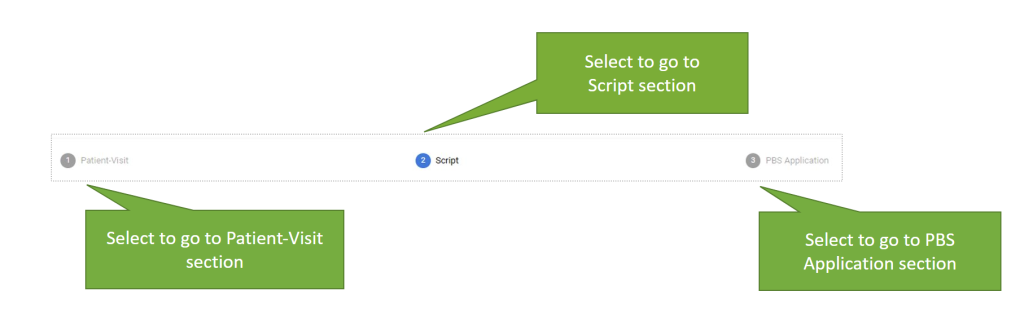
When creating a new script, there are 3 steps to be taken:
- Patient-Visit (Select Patient & Visit details)
- Script (Capture Authorized Script details)
- PBS (Capture PBS application form details) – if needed
In the script creation form, you can select the headings at the top to go to their respective sections.
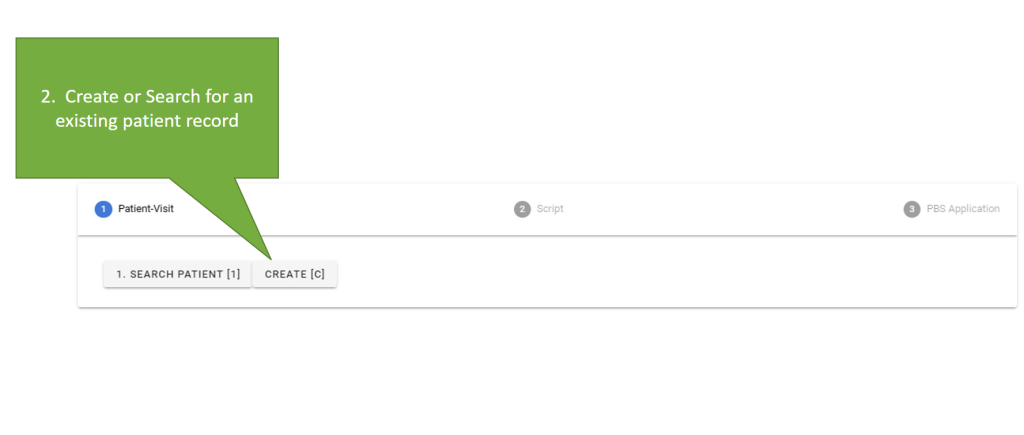
Step 3.1:
Patient-Visit (Select Patient & Visit details)
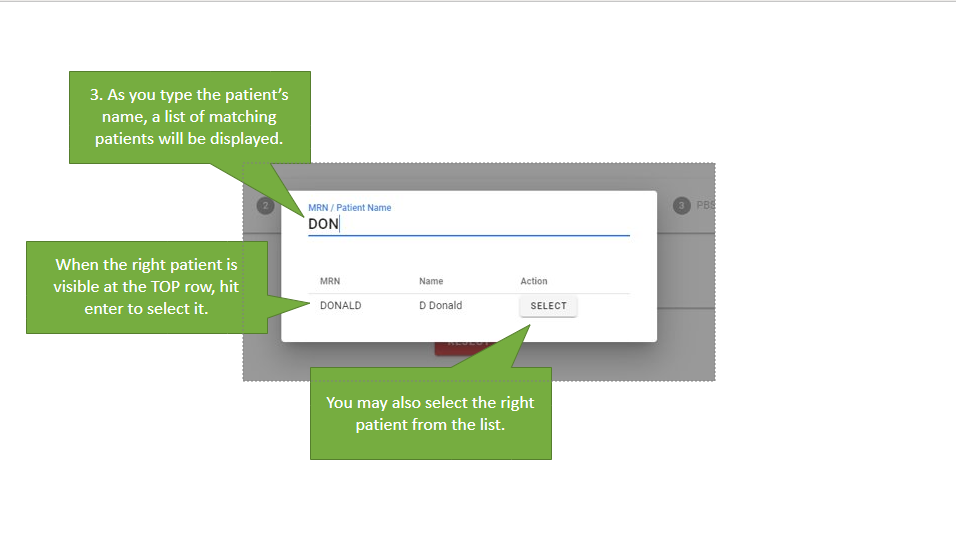
Click ‘Create‘ to add a new patient record, else click on ‘Search Patient‘ to find an existing patient record.
When the patient being searched for appears in the list, click on ‘Select‘ to select that patient.
When a patient has been selected/created, the page should look as follows.
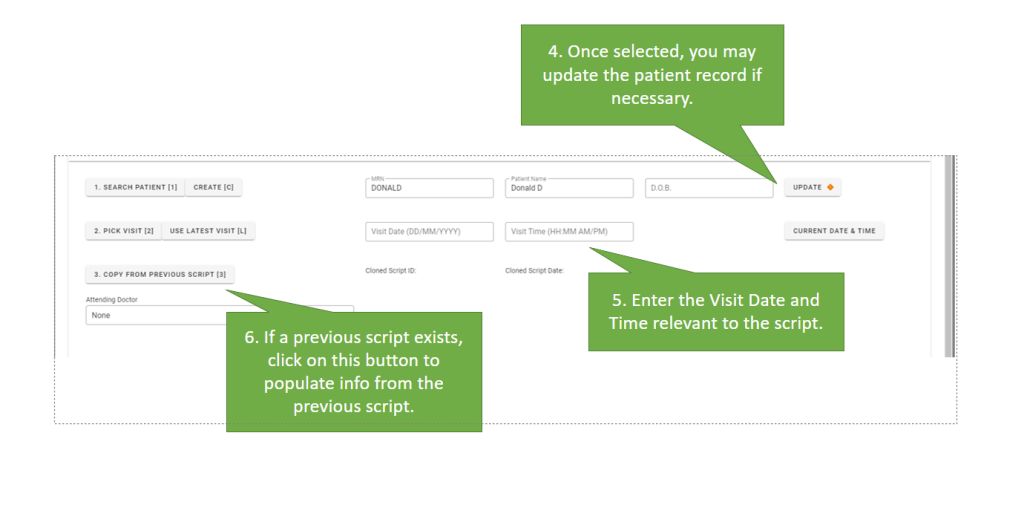
Else, fill in the remaining fields of
- Attending Doctor
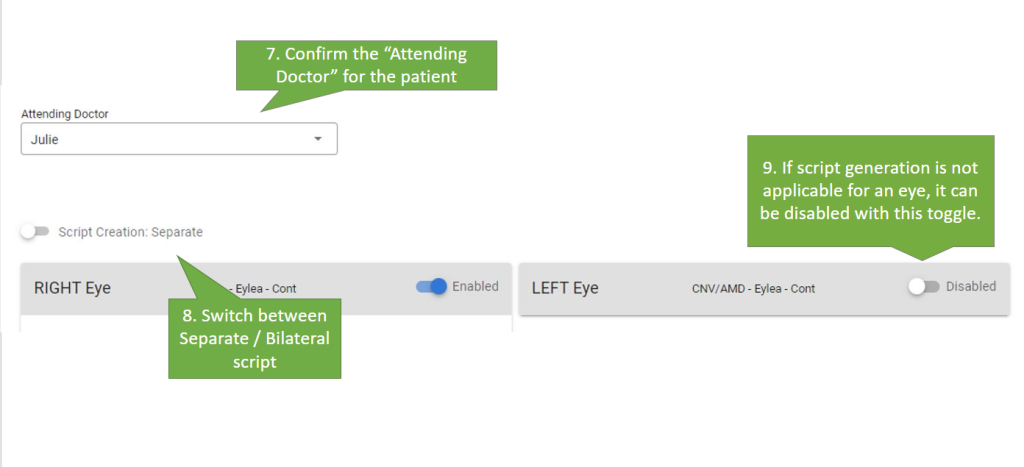
- Right & Left eye Diagnosis and Injection (Separate/Bilateral)
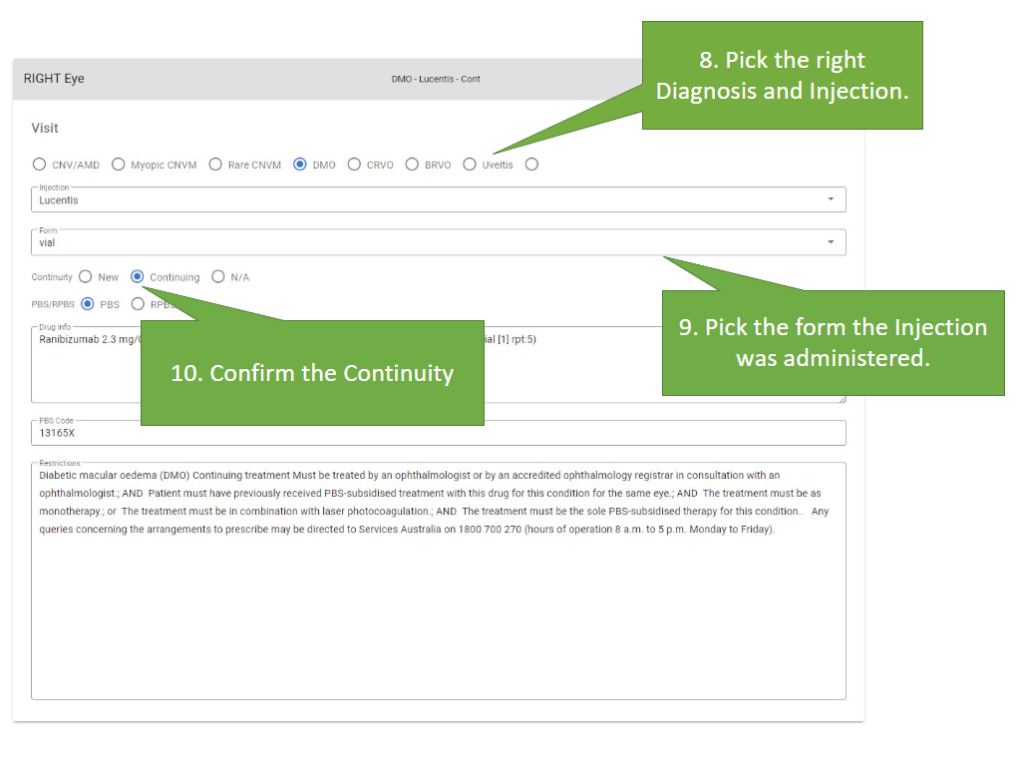
The PBS Code, as well as the Restrictions field will be filled in automatically.
Then click on ‘Create/Regenerate Script‘ to create a draft script.
Step 3.2:
Script (Capture Authorized Script details)
In this step, details on the Diagnosis and the Injection have been filled in, and a draft script is generated.
In the draft script, we need to:
- Confirm the Quantity and Repeats of the prescription.
- Fill in any remaining fields that are relevant.
- Confirm the generated script text is accurate.
- Manual edits are able to be made to the generated script should the need for edits arise.
- Obtain and fill in a Phone Approval Number from PBS(only if required)
For each script, a unique Authority Prescription Number is also automatically generated.
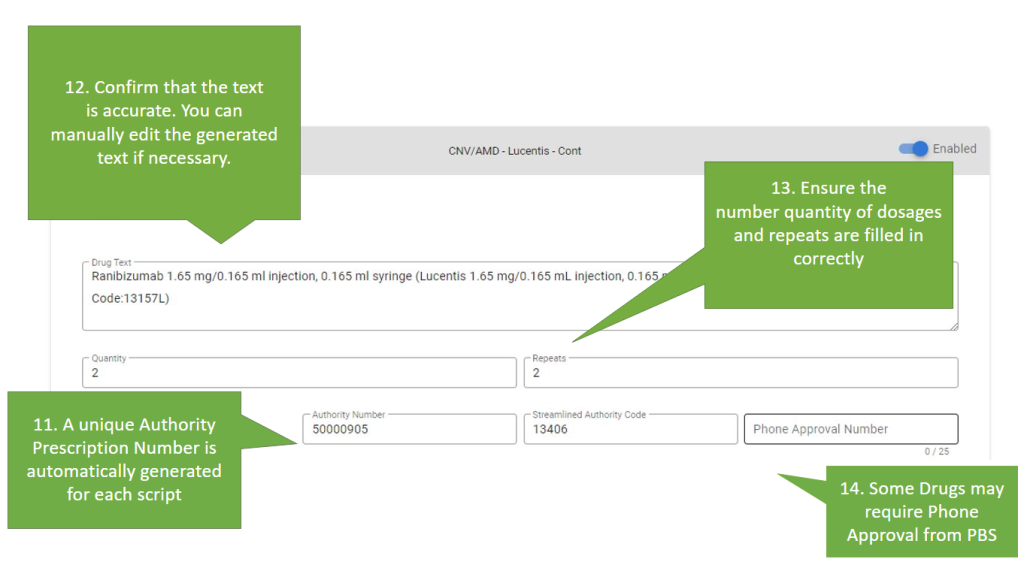
Depending on the Prescription, a Phone Approval Number from PBS may need to be manually obtained by the Doctor.
Once the script details have been confirmed, you can scroll to the bottom of the section and:
- Save the script
- Saving the script allows the user to save their progress, enabling them to come back to finish the script generation in the future.
- Confirm the script
- Reject the script
- Stop generation of current script. The user will also no longer be able to edit, approve, or print the script.

Step 3.3:
PBS (Capture PBS application form details) – if needed
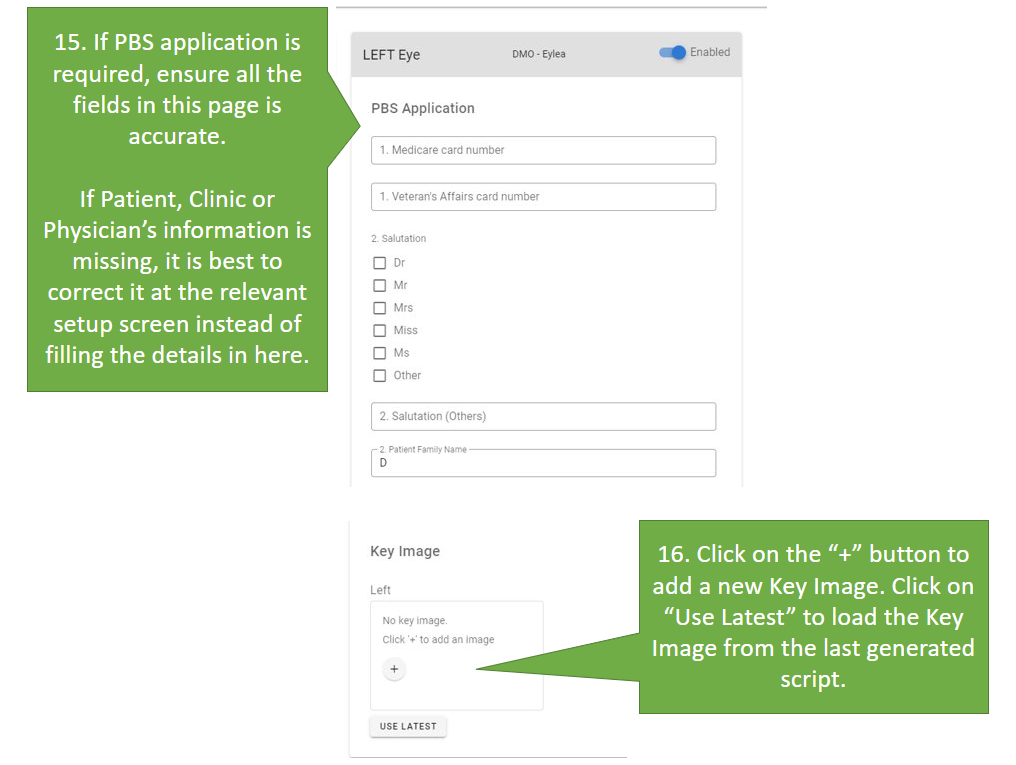
In this section, we will be filling in the PBS application form details.
To begin, fill in the relevant Patient, Clinic and Physician information.
Then click on the ‘+‘ button to add a new Key Image. Alternatively, you can reuse the Key Image from the patient’s last generated script by clicking on ‘Use Latest‘.
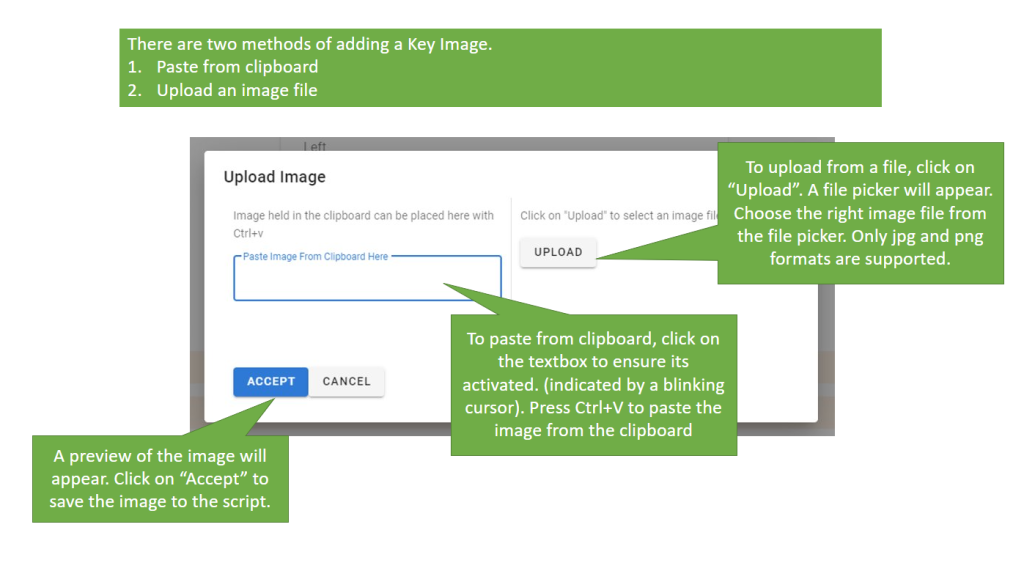
When uploading a Key Image, the user can choose to copy and paste the image into the provided textbox, or click on the ‘Upload‘ button to manually select the image file from their device.
Once a Key Image has been selected, a preview of the image will appear, and then user can click on ‘Accept‘ to save the image to the script.
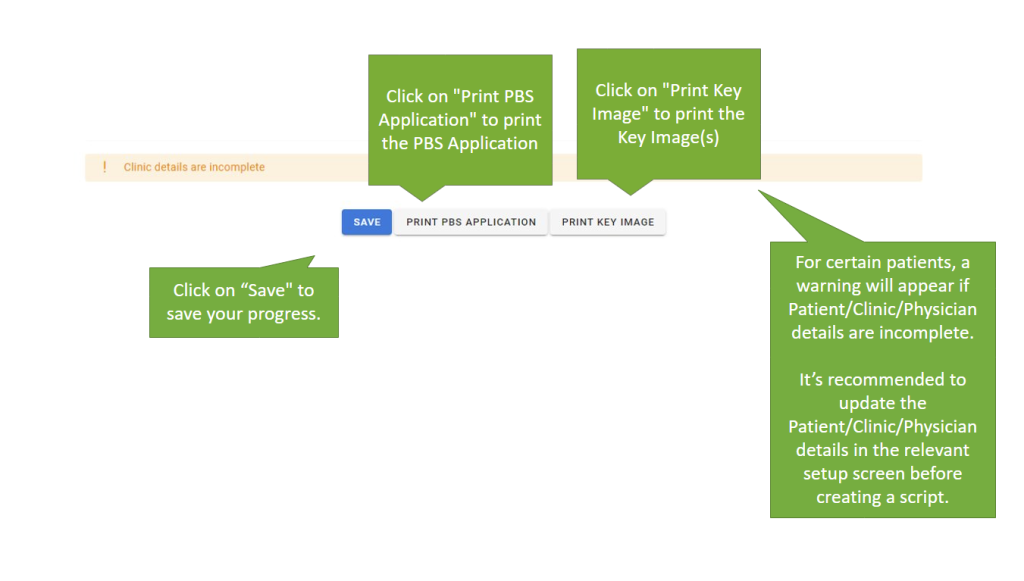
Relevant warnings will appear should there be any incomplete details.
The user may then save the progress of the PBS application form, and also print their PBS application and key image(s).
Step 4
Once the script has been confirmed, the user may return to the script tab, and scroll to the bottom to complete the processing of the script.

Users are restricted to certain actions based on their Role. Details are shown below.
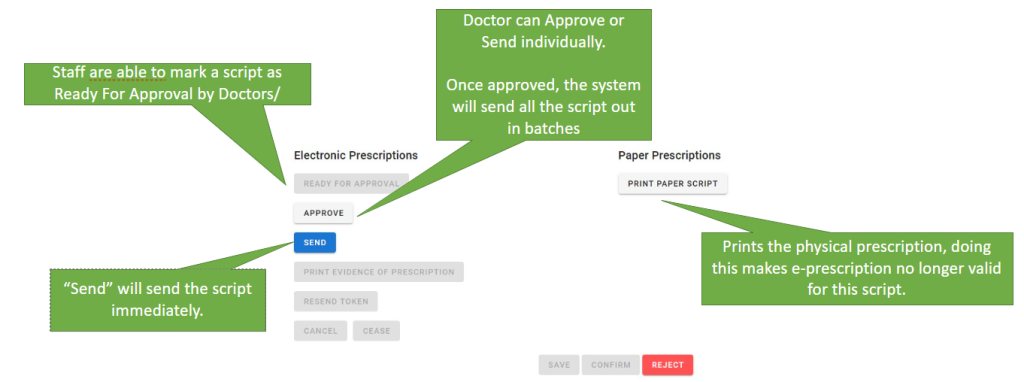
Staff:
Staff are only able to mark the script as Ready for Approval by a doctor, or print a paper prescription.

Doctors:
If a script has been marked as Ready for Approval, Doctors are able to approve these scripts, or choose to directly send the e-prescription to Prescription Delivery Service(PDS), or print the paper prescription directly.
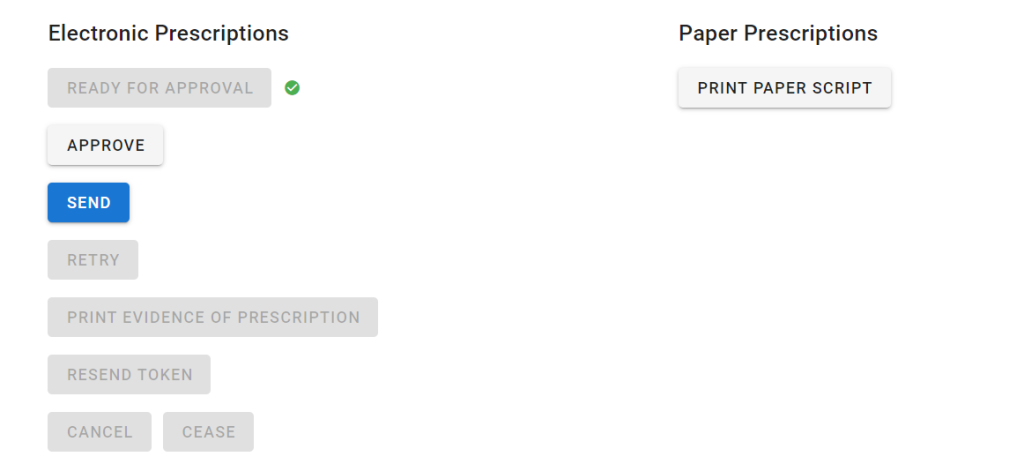
Once the script is sent, the doctor may print the evidence of prescription, and pass it to the patient.
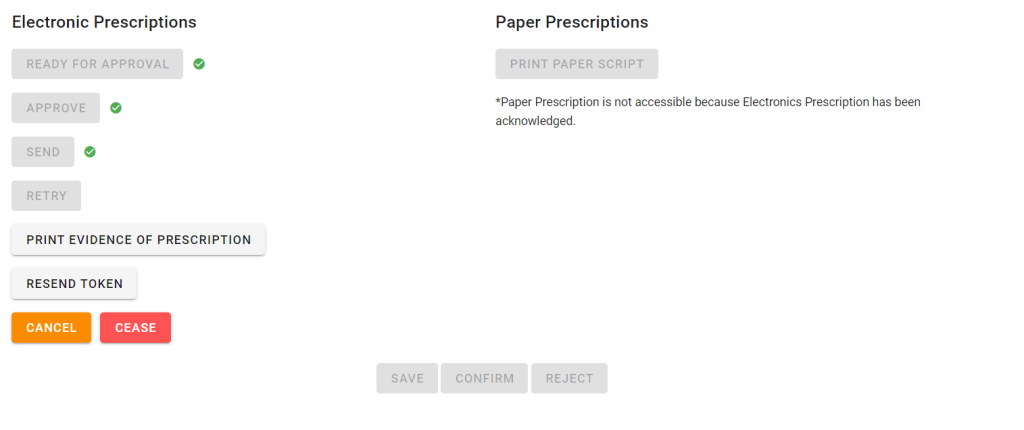
The script can be cancelled or ceased, should the need arise.